
Yesterday I did what I do best – procrastinate writing – in order to do what I love most – cook, buy cookbooks and peruse nurseries. I contemplate ways of sneaking my three new hardcover purchases into the cookbook collection in the said tiny kitchen without my other half noticing.
So now I finally sit down to write in the sweltering London heat, perched laptop on knee on the couch in front of the big open sash windows in an attempt to get whatever breathless gasps of breeze exist into the overheated apartment. Out of the corner of my eye I can see the bright shades of pink pelargonium and cosmos and lilac lavender, which I acquired whilst procrastinating, stirring in the breeze on the window sill. I smile.
Despite the unusual heat this week I have had an insatiable need to recreate my absolute favourite coffee time treat – the chocolate twist. I’ve been eyeing them up for weeks trying to work out exactly how they’re constructed. Whether right or not, my conclusion is that they’re made of a delicate croissant like pastry, laced with crème pâtissière, sprinkled with bitter-sweet chocolate bits and then twisted into strips of deliciousness which are baked and then finished off with a dusting of icing sugar.
Croissant pastry, being a yeast-milk-and-flour dough which is risen and delicately folded to incorporate dozens of layers of butter, is not something I’ve ever tried – and if I’m honest have steered clear of due to the time and effort it takes to make. However, although the process took about 24 hours, the effort wasn’t immense and was definitely well worth it. If you don’t have the time or inclination, I’m sure this recipe will still work if ready to roll puff pastry is used.
The pastry and crème pâtissière recipes I’ve based on Julia Child’s recipes from her book Mastering the Art of French Cooking.
Makes about 9 chocolate twists.
Pastry
7g fresh yeast (or a 7g sachet of dry yeast)
3 tbs warm water (not over 37°C)
3 tsp castor sugar
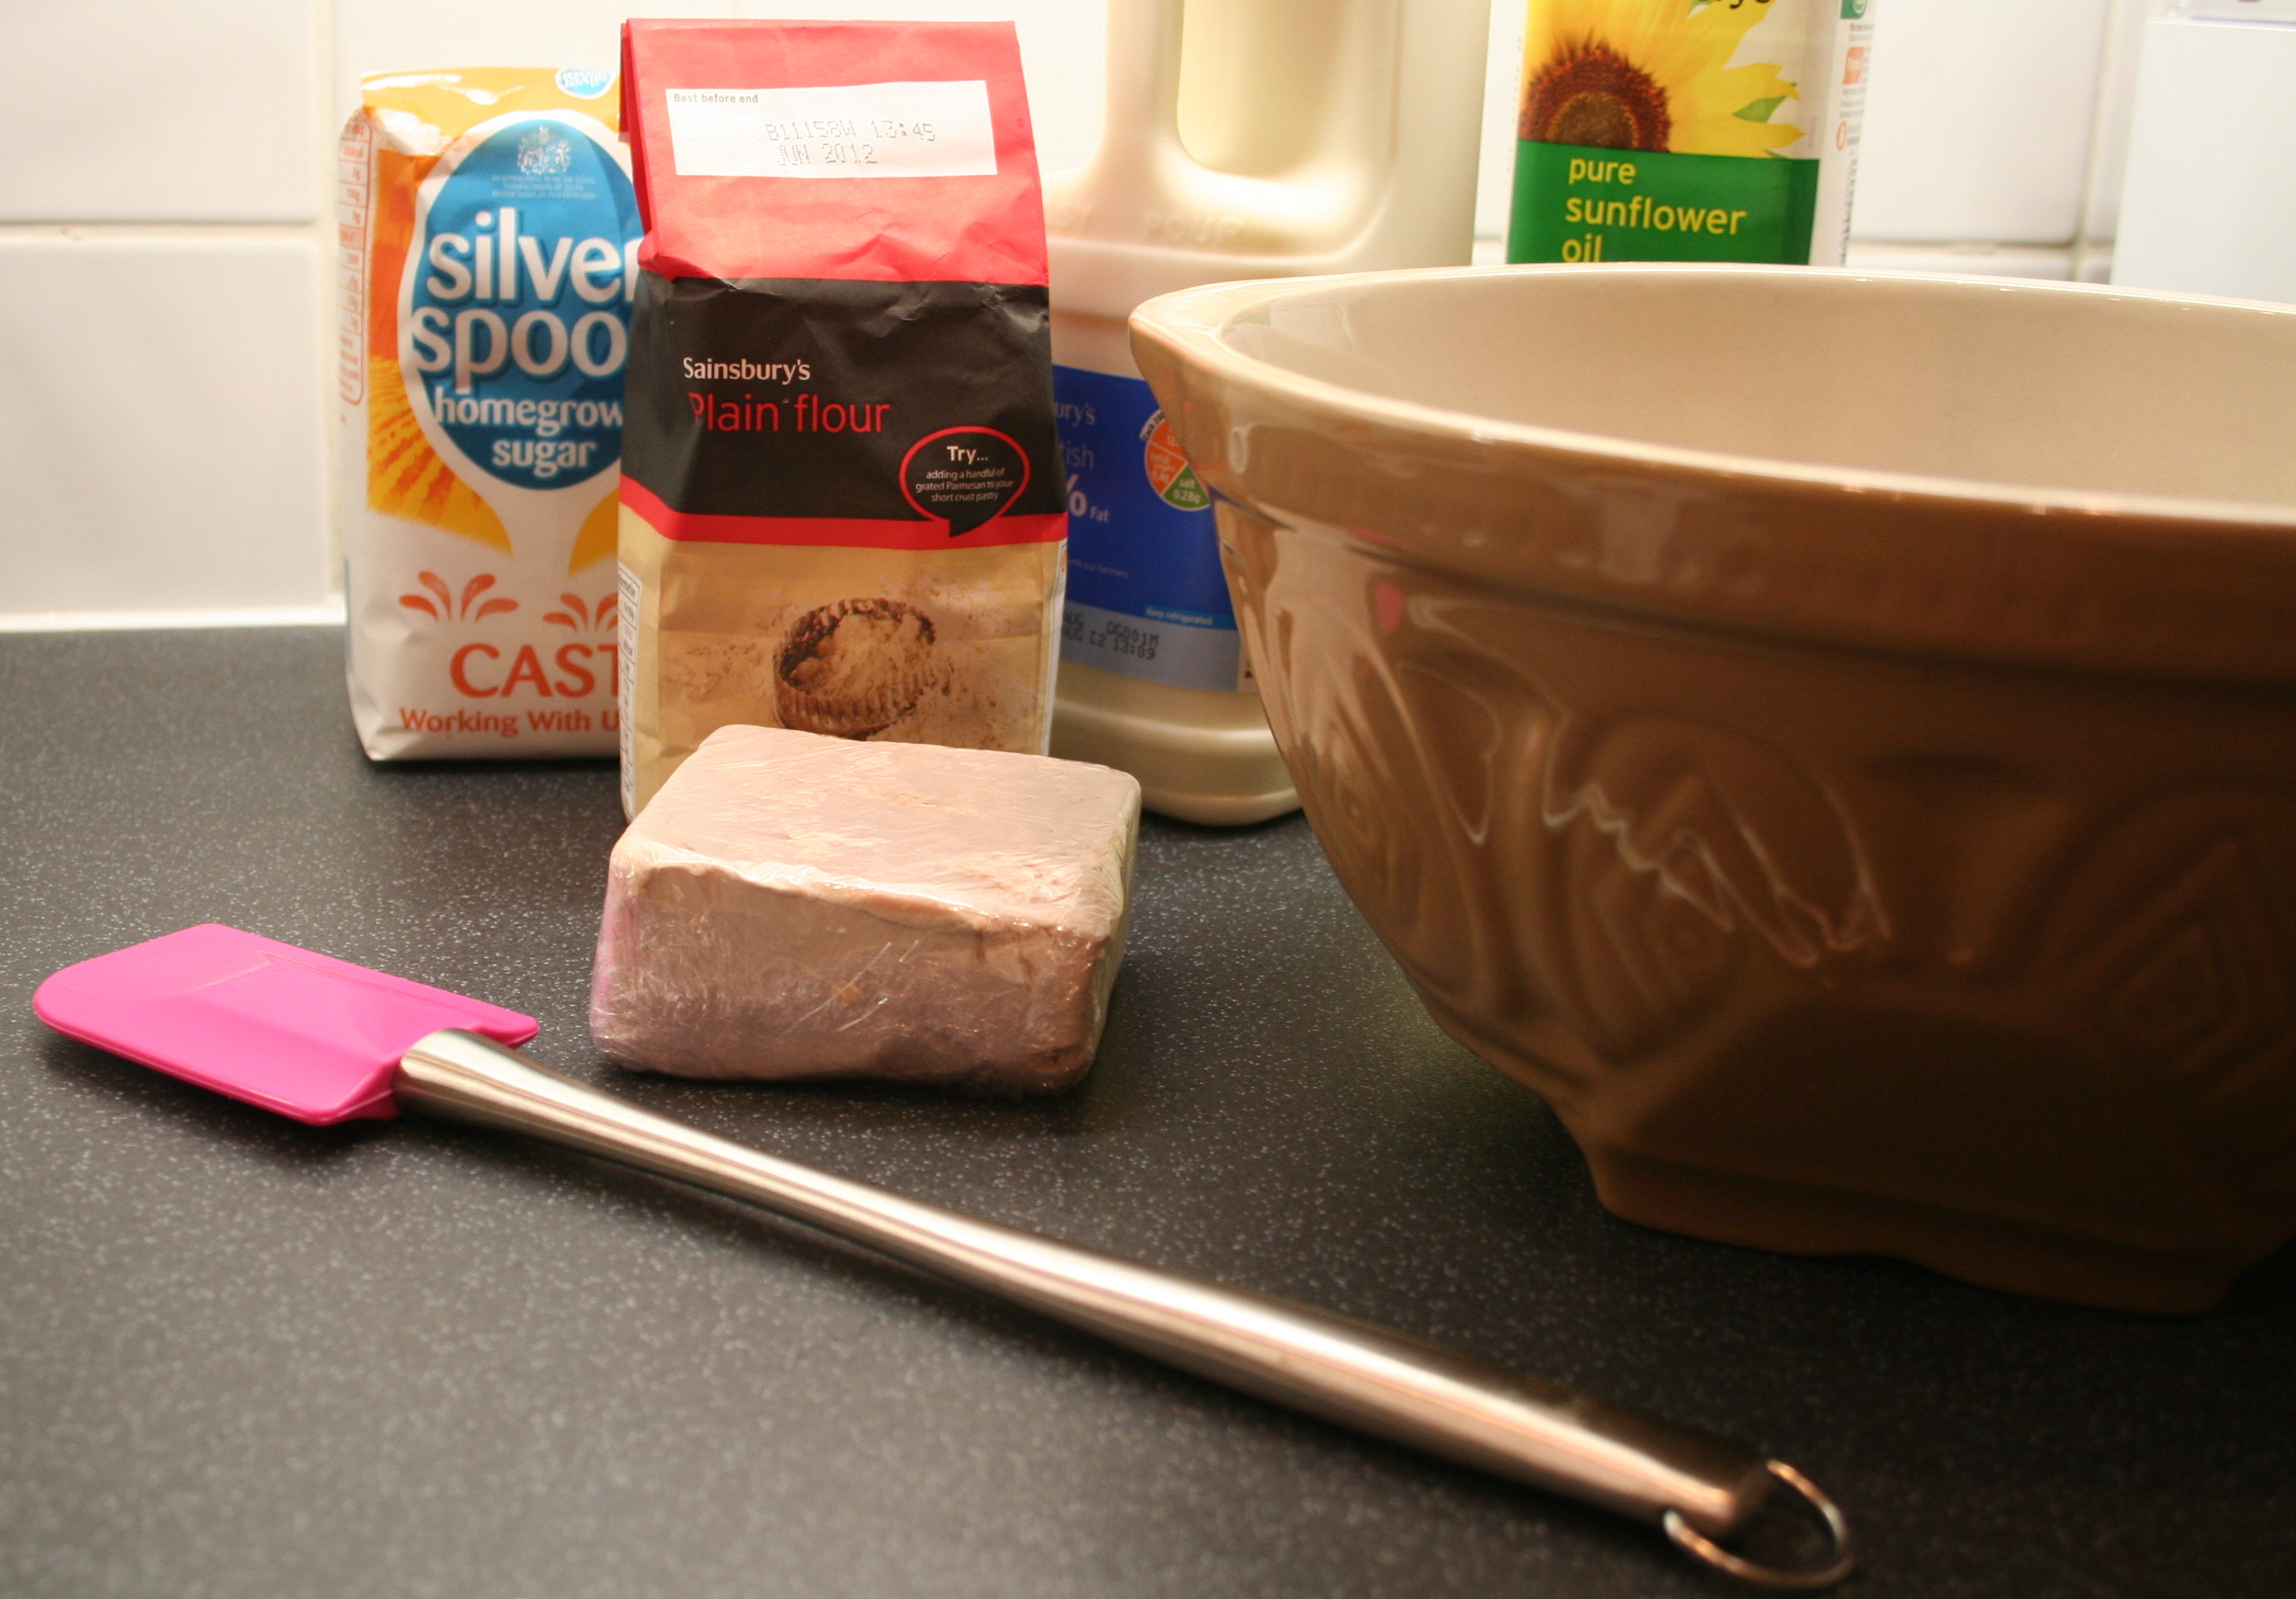
225 g plain flour
1 tsp salt
120 ml warm milk (not over 37°C)
2 tbs sunflower or canola oil
115g chilled unsalted, high quality butter
Stir the yeast and 1 tsp castor sugar (the other 2 tsp will be used later) into the warm water. Allow to stand and dissolve for a few minutes. Add the remaining 2tsp castor sugar and salt into the warm milk and stir until dissolved.
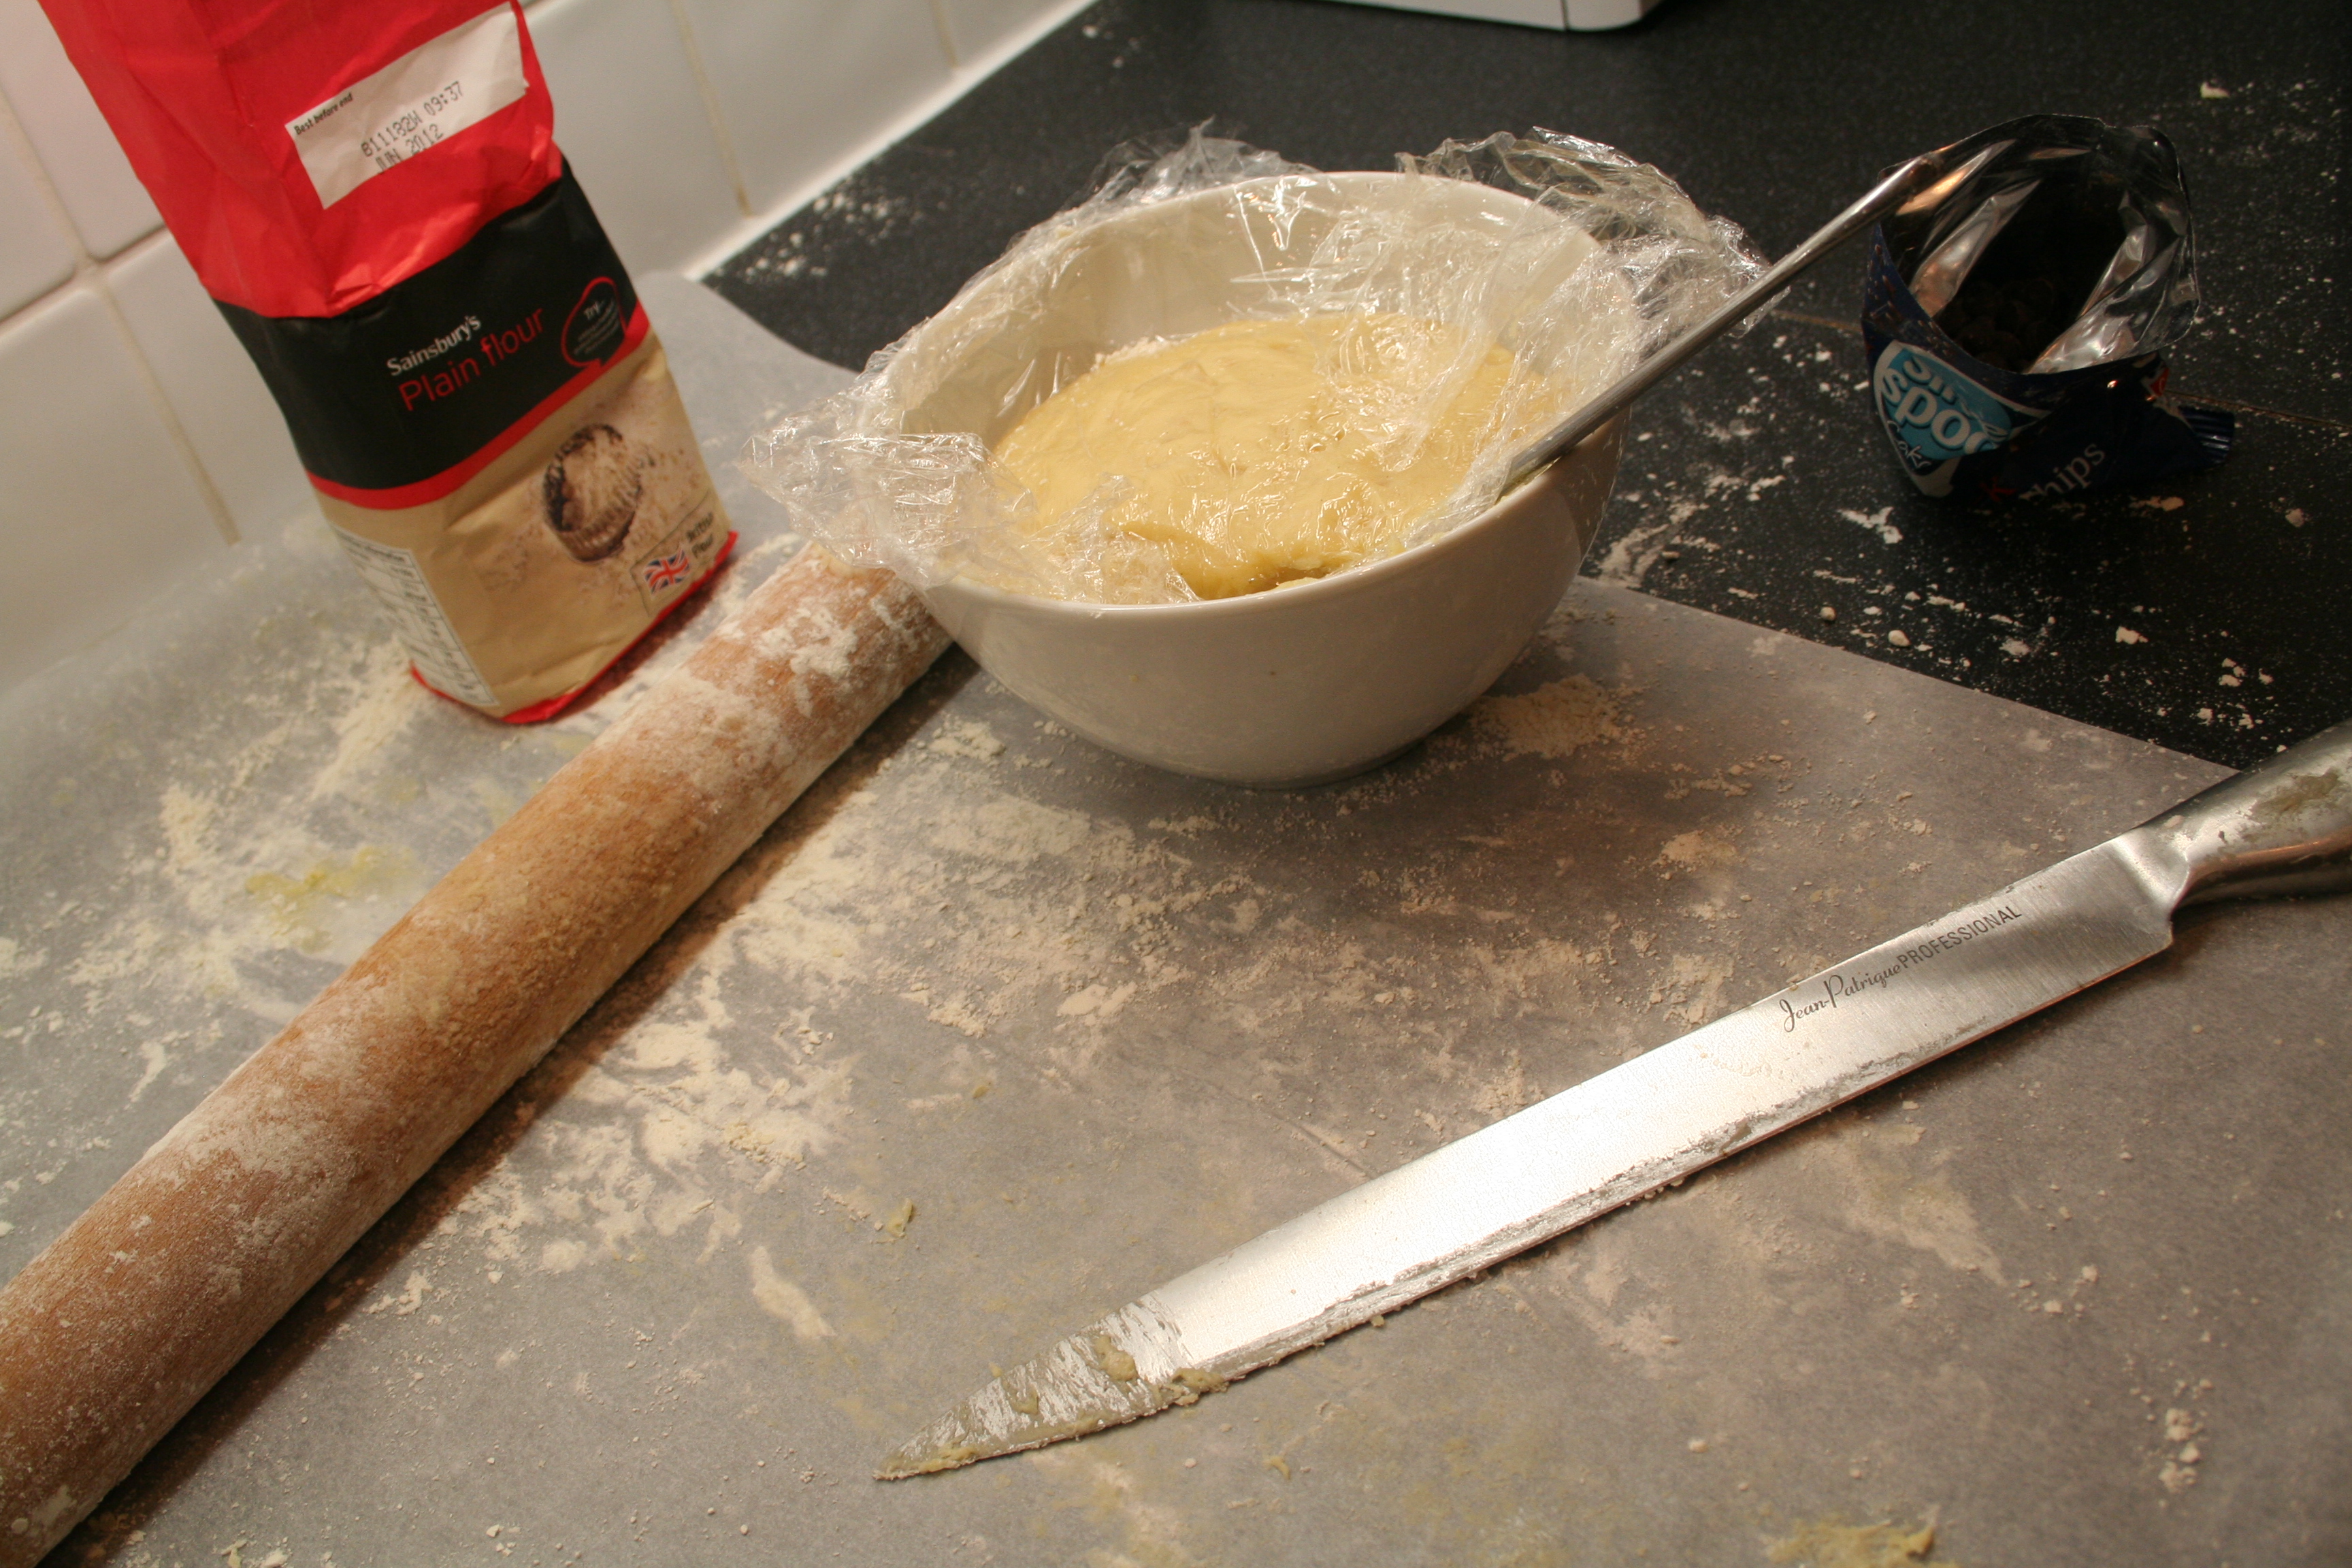
Sift the flour into a large mixing bowl. Make a well in the middle and pour the water-yeast and milk-sugar mixtures into the flour. Using a rubber spatula work the mixture into a dough ensuring that all bits of loose flour are gathered into a sticky ball.
Using the spatula turn the dough out onto a floured kneading surface. A wooden board or kitchen work top is perfect for this. Let rest for 2 to 3 minutes whilst washing and drying the bowl. The rest will allow the flour to absorb all the liquid – the dough will be quite soft and sticky.
With the aid of a pastry scraper or spatula lift the dough off the surface from one end and flip it over. Rapidly repeat this process 8 to 10 times until the dough forms a ball, feels smooth and draws back into shape when pushed out. This is all the kneading the dough should have – it should have just enough body to hold the dough together when eventually rolled out, but it is important not to over activate the gluten as this will make the dough difficult to handle.
rise 1
Place the dough back into the clean bowl, cover with cling film and wrap the bowl in towel. The bowl should be placed in a spot where the temperature is about 21°C-22°C for between 3 to 4 hours until the dough has risen to three and half times its original volume. I let the dough rise in my tiny kitchen with the door closed as this is generally the warmest room in the house. Once risen the dough will be light and springy to the touch.
rise 2
Deflate the dough by scraping it away from the edges of the bowl with a rubber spatula – it should collapse easily. Turn out of the bowl onto a lightly floured surface with the spatula. Gently pat and push the dough into a rectangle 20cm wide by 30cm long. Fold into three, like folding a business letter, by folding the bottom third of the rectangle over to cover the middle third and then fold the top third on top of the bottom third also covering the middle third. The rectangle should now be about 10cm wide by 20cm long.
Place the dough back into the bowl, again covering with cling film and the towel. Allow to rise again in a spot where the temperature is about 21°C-22°C for between 1 and 2 hours until the dough has doubled in size. Alternatively place the bowl (without the towel) in the fridge overnight allowing it to rise slowly – which is what I did due to time constraints.
If the dough rises at room temperature, once doubled in size turn out onto a lightly floured plate, wrap in cling film and place in the fridge for 20 minutes which will make the next step easier.
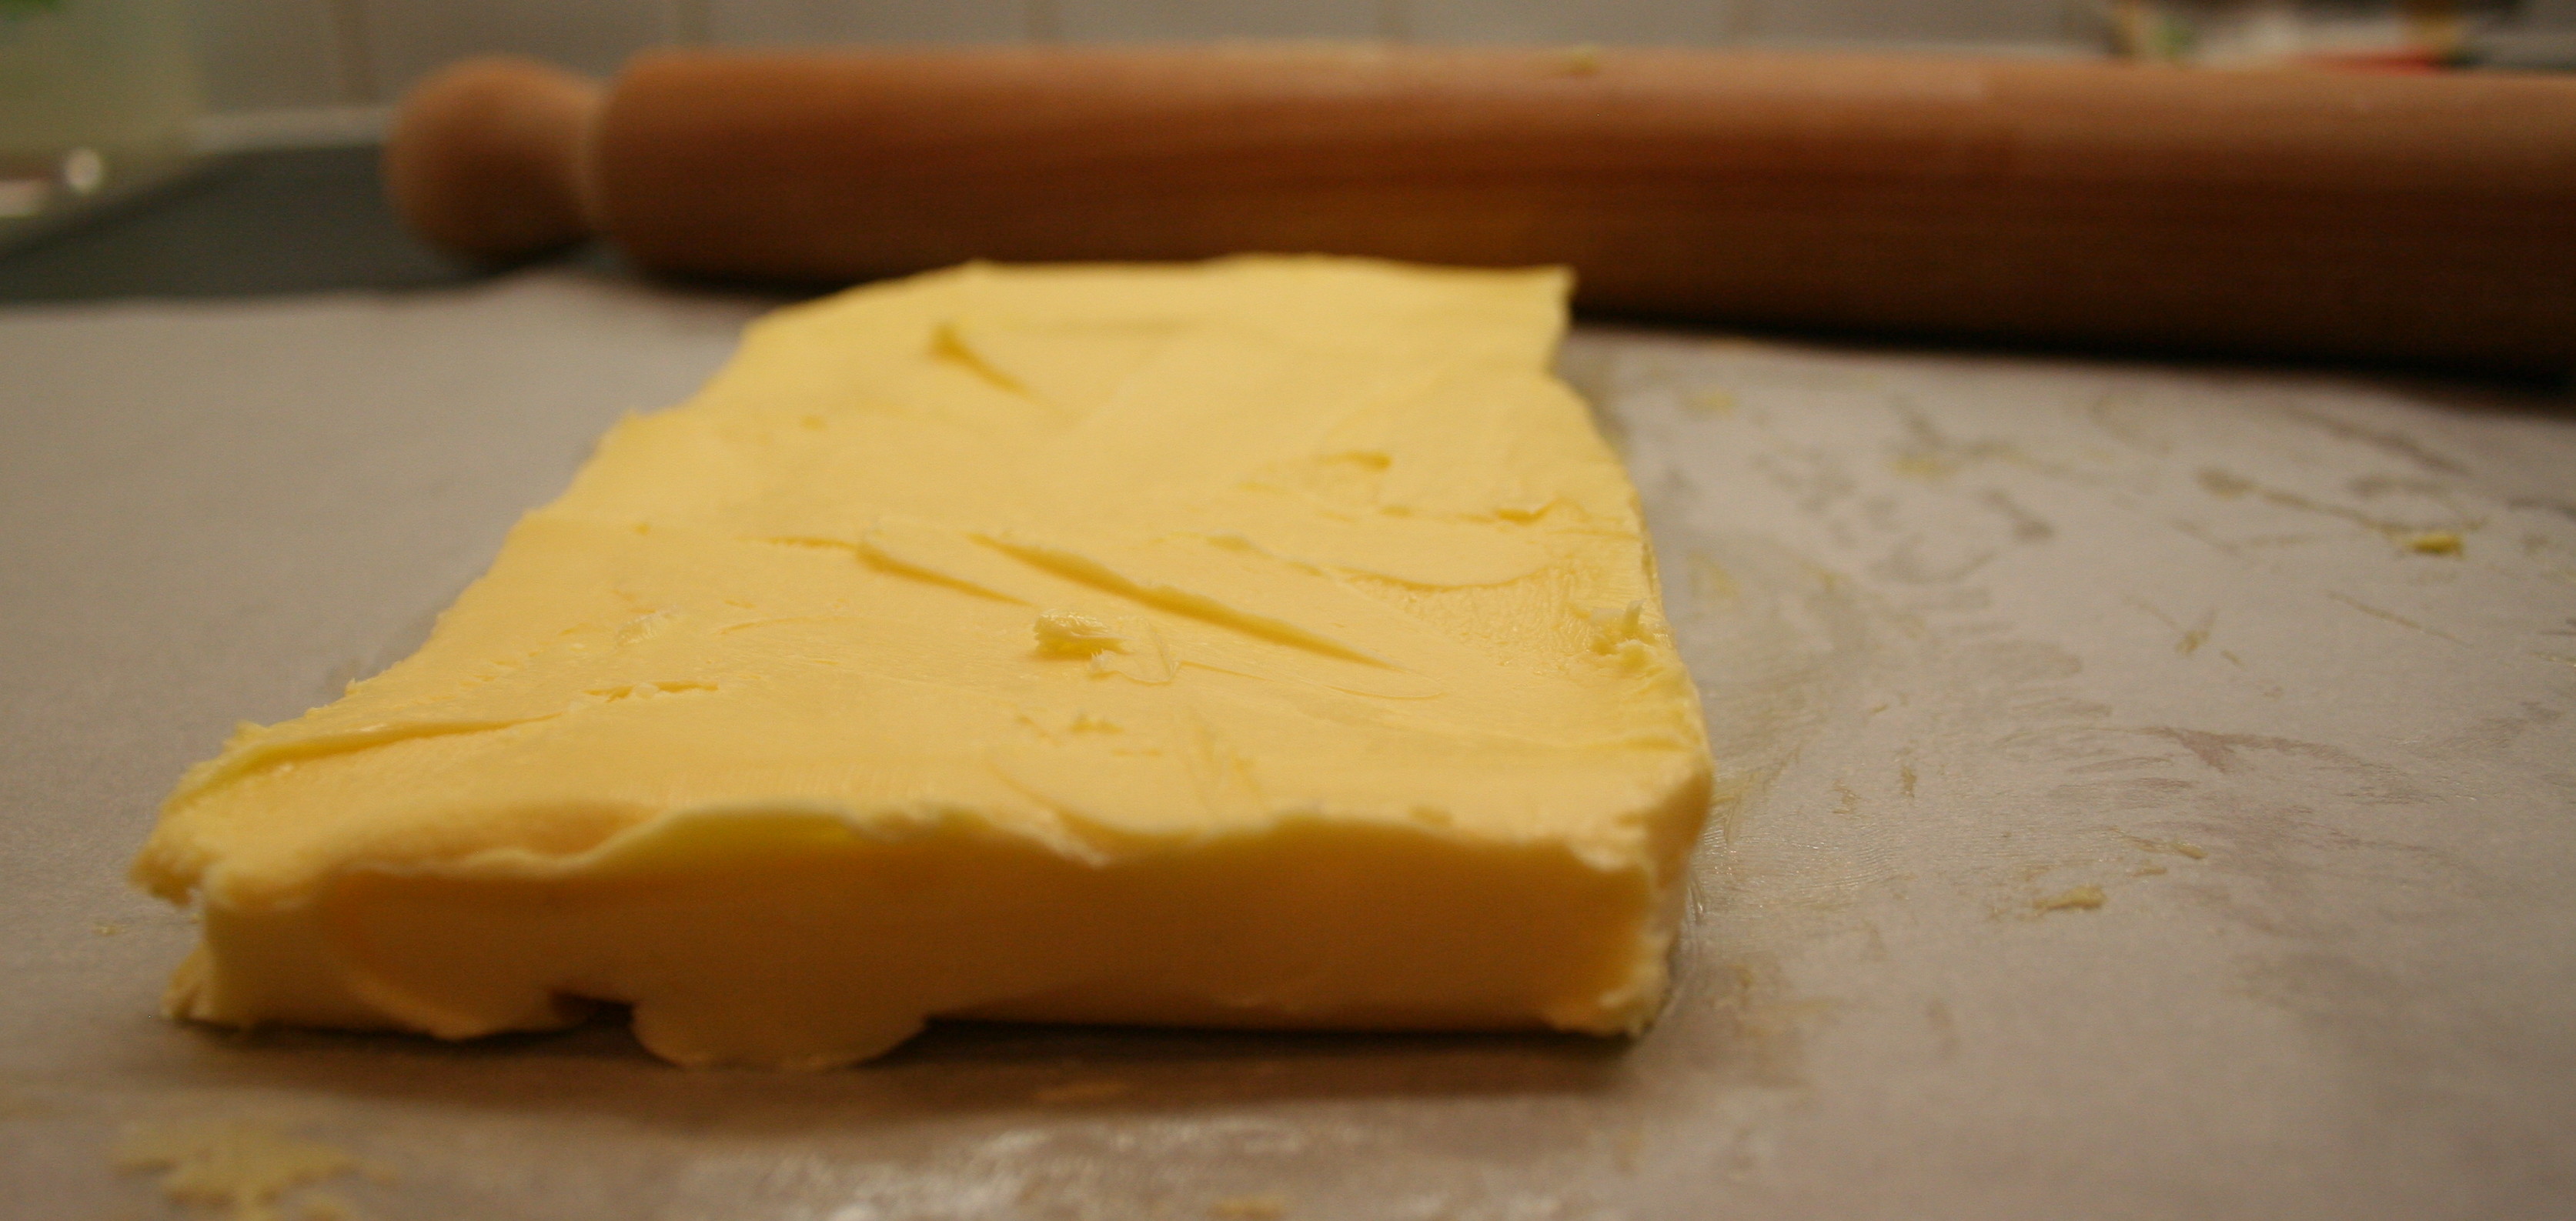
While the dough is cooling, take the chilled butter out of the fridge and place on a sheet of grease proof paper. Using a rolling pin beat the block down into a square of about 19cm by 19cm. Once beaten the exact rectangle dimensions can be scraped and spread out using a butter knife or spatula. The idea is get the butter into a cold, spreadable consistency without it warming up and becoming melted and oily. If this happens refrigerate until cold again.
Place the chilled dough on a lightly floured surface. A marble slab is ideal for this as it keeps the dough cool; however I don’t have one and so used the clean kitchen counter instead which worked just as well. With lightly floured hands push and pat the dough into a rectangle about 20cm wide by 35cm long. Turn the grease proof paper and butter over onto the dough so that it covers the top two thirds of the dough – leaving a 0.5cm border all the way around. Peel off the paper leaving the butter on the dough.
fold 1
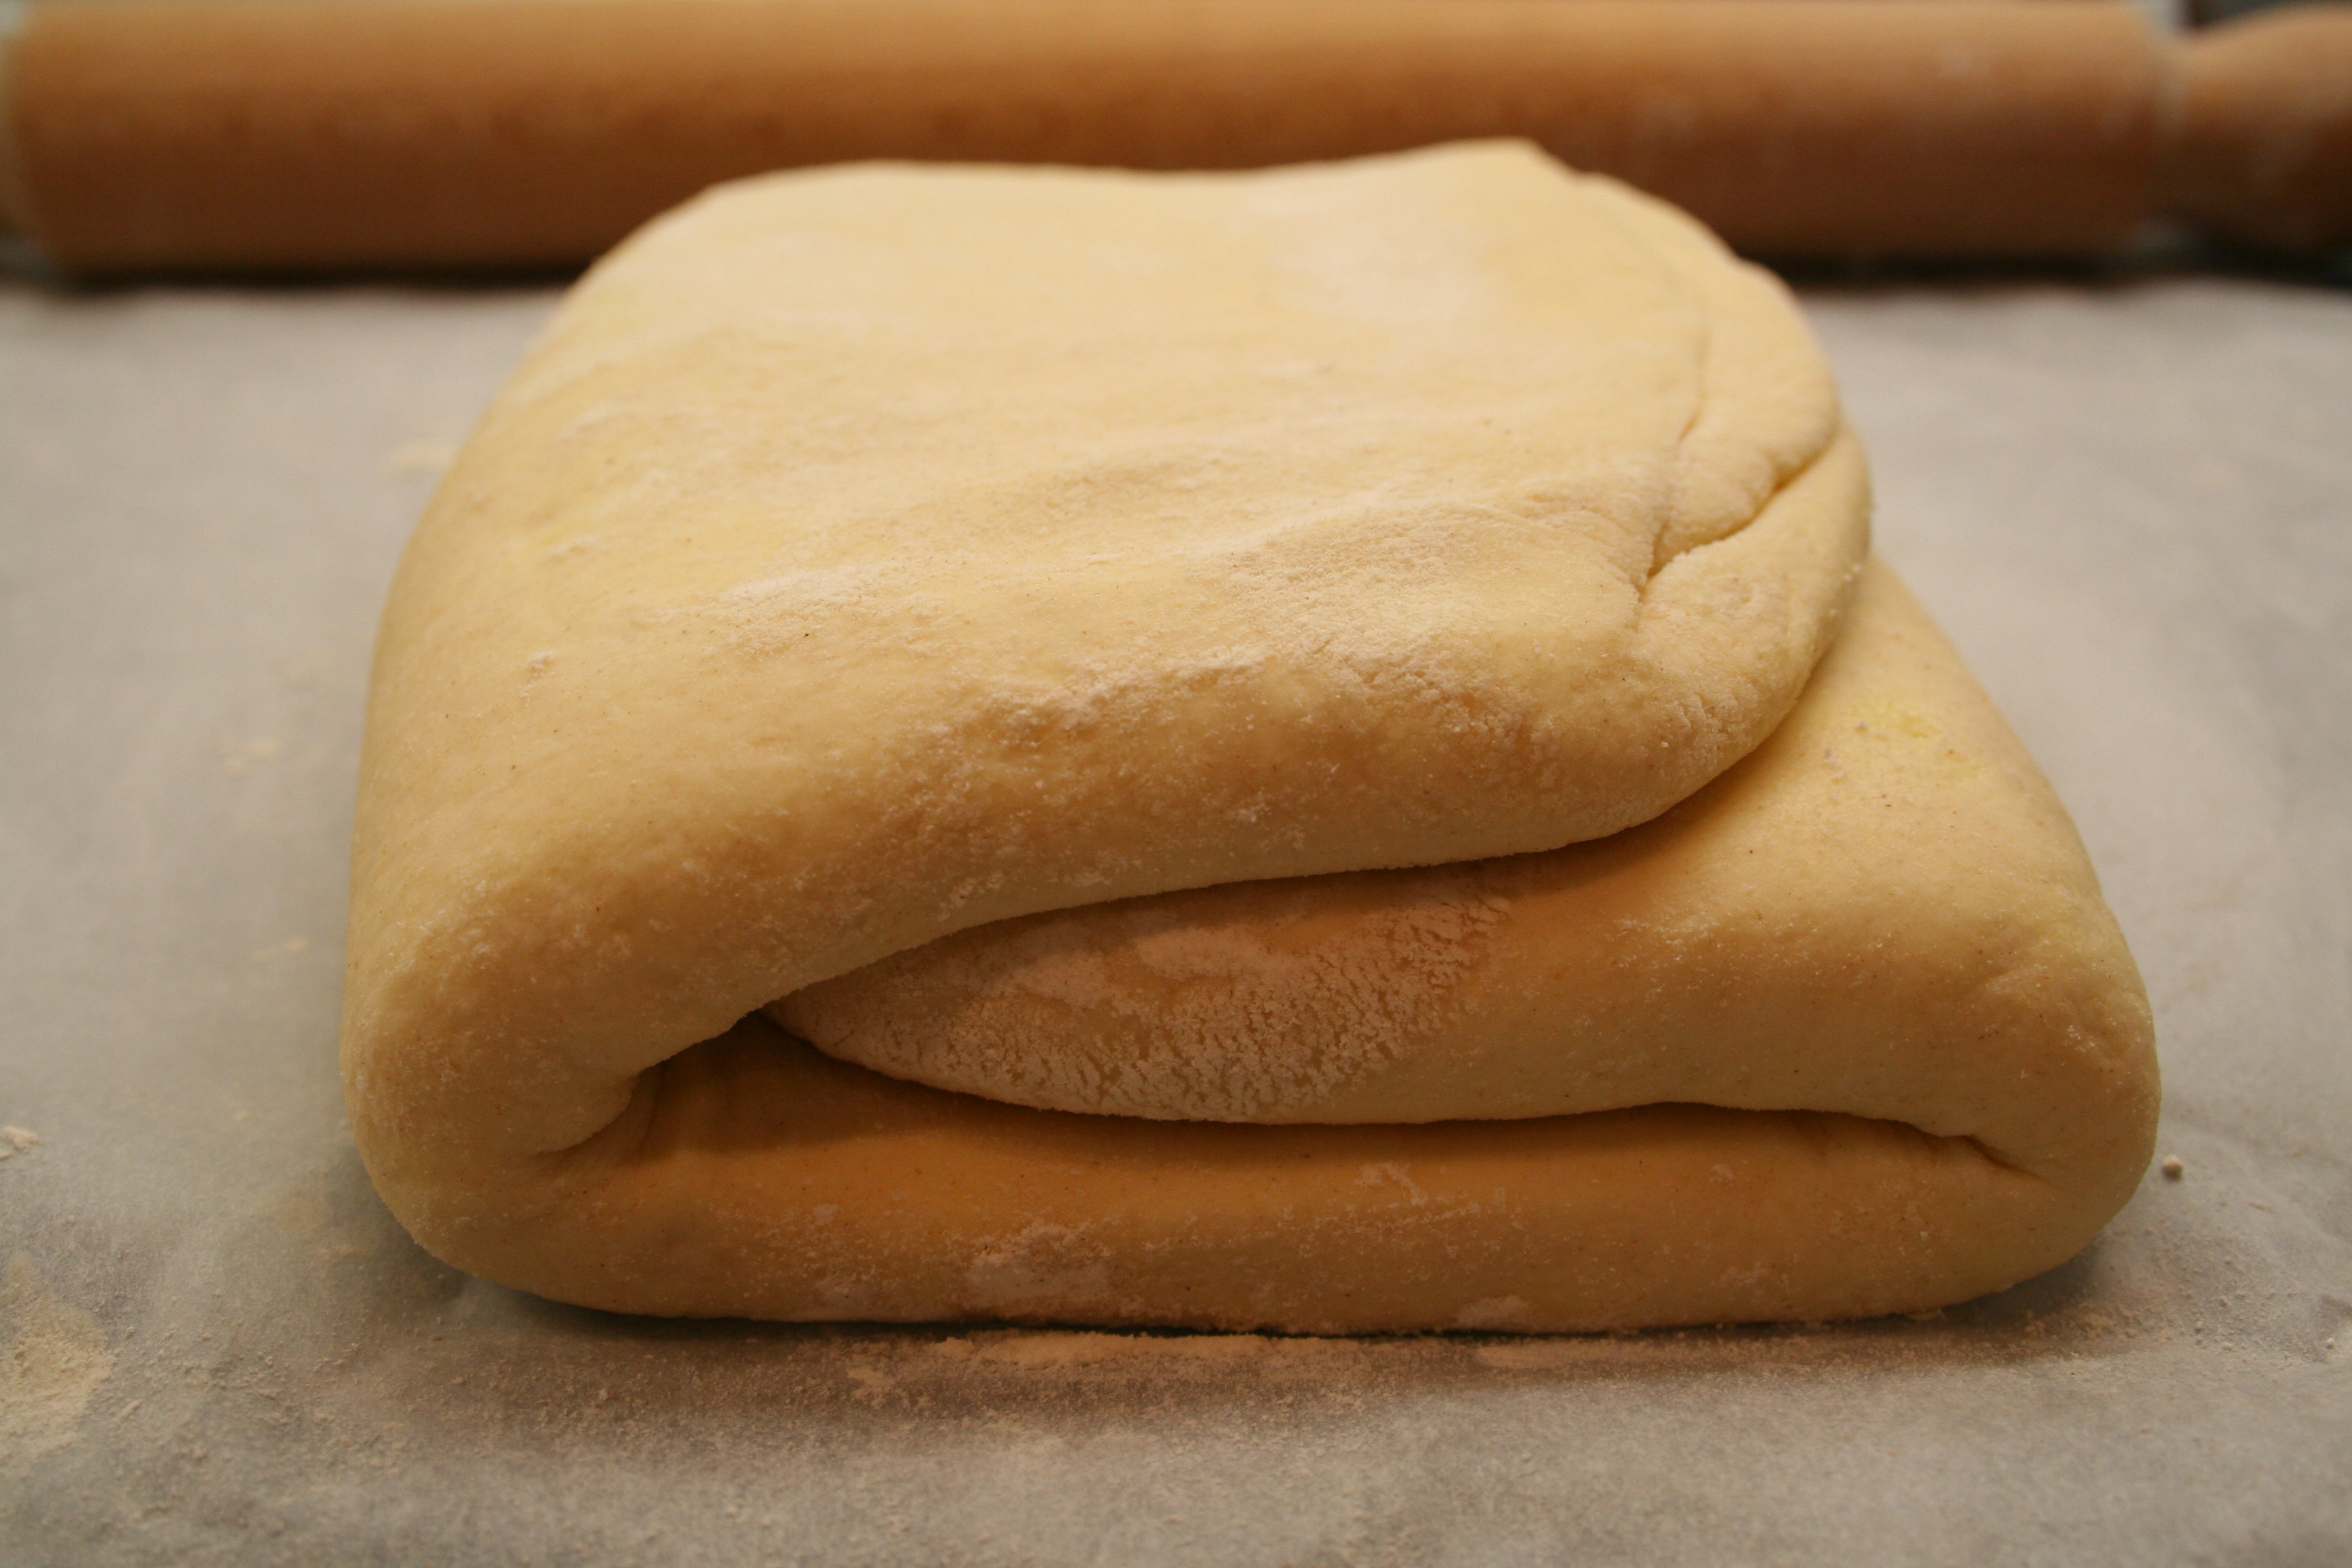
The dough is now ready to be folded into three layers – again like folding a business letter – by folding the bottom unbuttered third of the rectangle over to cover the buttered middle third and then folding the top buttered third on top of the bottom third. This will form 3 layers of dough separated by two layers of butter.
fold 2
On a lightly floured surface turn the dough so that the edge of the top flap is on your right – as though it were a book which could be opened. Lightly flour the top of the dough, and using a rolling pin roll the dough into a rectangle of about 15cm by 35cm. Roll rapidly from 2cm of the near end to 2cm of the far end. Fold in three again like a business letter (as in fold 1). This will form 7 layers of dough separated by 6 layers of butter.
Sprinkle lightly with flour and wrap dough in grease proof paper. Refrigerate and rest dough for an hour to an hour and a half to deactivate the gluten – which will make the final two folds easier.
fold 3
Unwrap the dough, sprinkle lightly with flour and deflate by tapping lightly several times with the rolling pin. Cover and let rest for 8 to 10 minutes to relax the gluten. Ensure the dough is lightly floured on both sides and roll into a rectangle of about 15cm by 35cm. Roll rapidly from 2cm of the near end to 2cm of the far end. Fold in three again like a business letter (as in fold 1).
fold 4
Roll dough out into a rectangle of about 15cm by 35cm and fold in three again like a business letter (as in fold 1). There will now be 55 layers of dough. Wrap and chill in the fridge for two hours before baking, or leave in the fridge overnight covered by a board and a 2kg weight.
Crème pâtissière
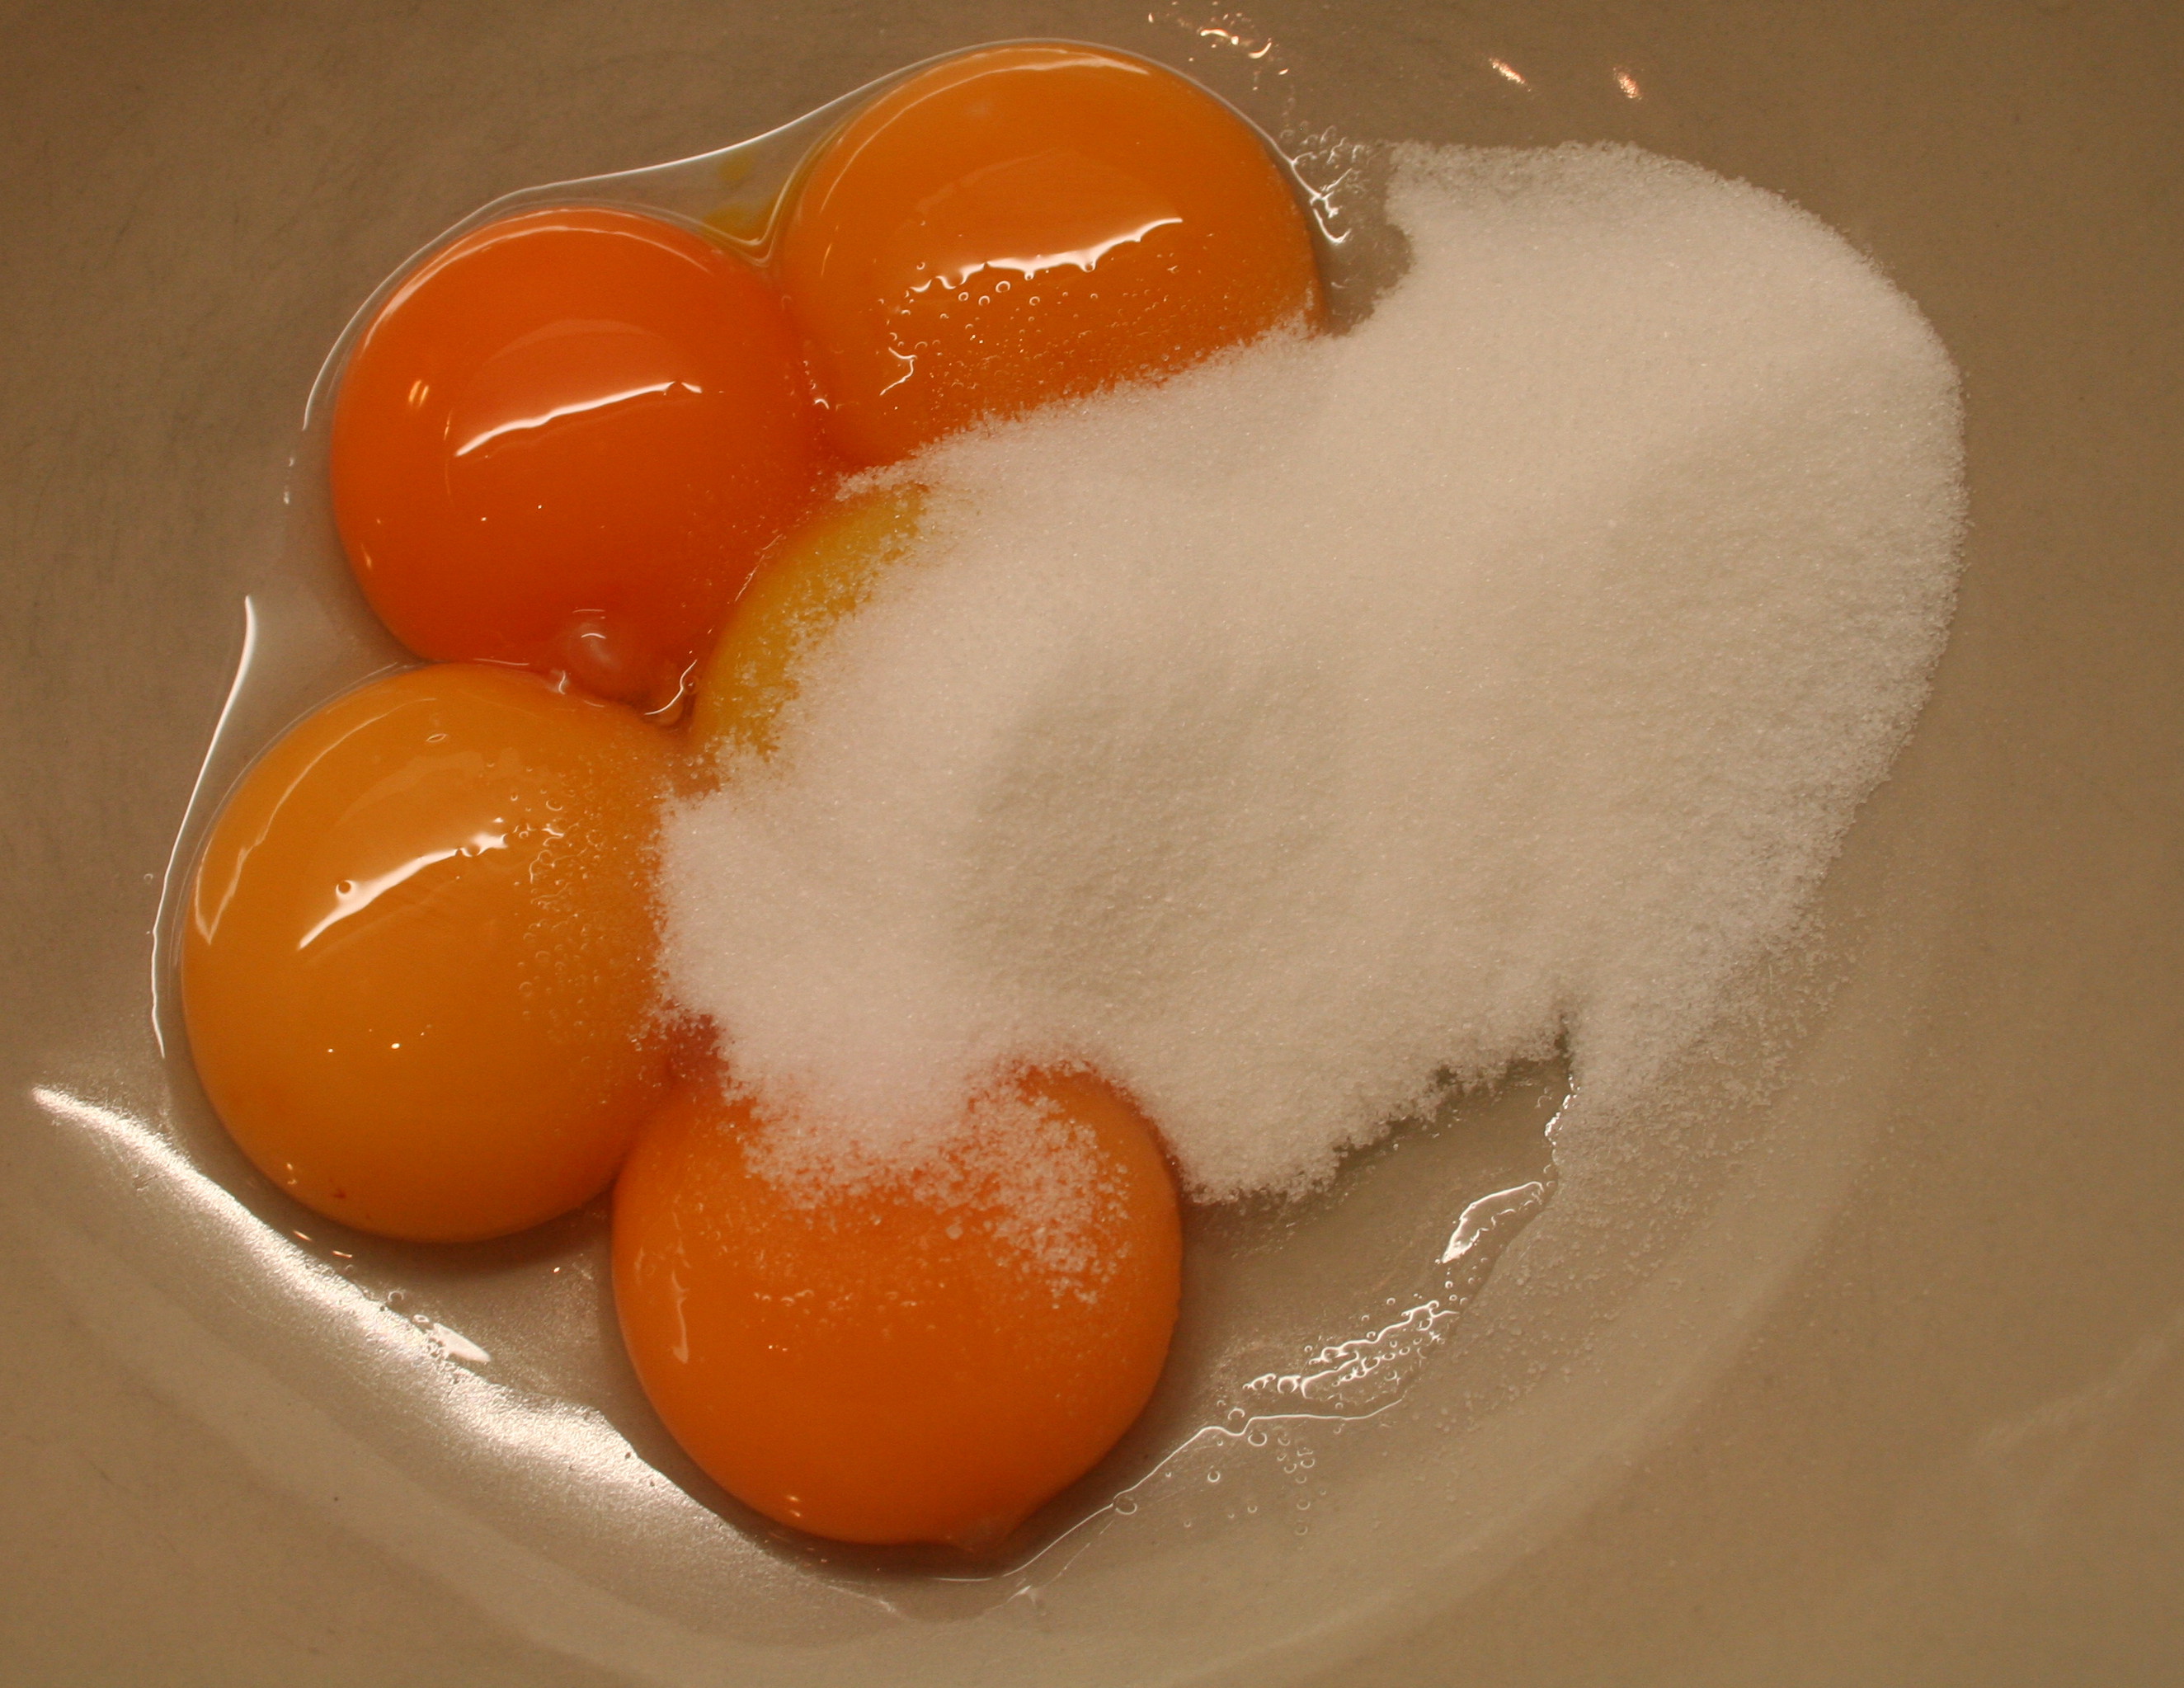
85g castor sugar
3 medium or 2 large egg yolks
40g plain flour
175ml boiling milk
10g butter
2 tsp vanilla extract
Although in principle custard, crème pâtissière contains flour to thicken it. While the dough is chilling begin making the crème pâtissière by gradually beating the sugar into the egg yolks in a bowl with an electric mixer. Once combined continue beating for 2 to 3 minutes until the mixture is pale yellow and runs off the mixer in a ribbon stream. Slowly beat in the flour.
Heat the milk in a saucepan on the stove and remove from heat as soon as it comes to boil. Gradually add the boiling milk to the flour, egg and sugar mixture in a thin stream of drops, beating all the while.
Pour the mixture back into the saucepan (or you may need to use a larger one) and place over a moderately high heat. Stir continuously with a wire whisk to stop the mixture sticking to the bottom of the saucepan. Whisk until the sauce comes to the boil – at which point it will turn lumpy (which is completely normal) but will smooth out as out as you whisk it. Turn the heat down and continue whisking for 2 to 3 minutes to cook the flour. Be very careful not to let the custard burn – it will brown very quickly.
Remove from the heat and whisk in the butter and vanilla extract. Transfer into a bowl and cover with cling film so that the cling film touches the custard preventing a skin from forming. Allow to cool while you roll out the dough.
Chocolate twists
Pastry
Crème pâtissière
100g dark chocolate (or more depending on your taste)
1 egg
Once the dough has rested in the fridge for 2 hours, or overnight, it is now ready to be rolled out and formed into chocolate twists.
Cut the dough equally into thirds – with each piece being roughly 10cm wide by 15cm long. Place one piece on a lightly floured surface and the other two wrapped in grease proof paper and back in the fridge. It is very important to keep the dough as cold as possible otherwise it will become difficult to handle.
Lightly flour the top of the dough, and using a rolling pin roll the dough rapidly lengthways to elongate the rectangle. When about double in length, fold the dough to halve it widthways and continue rolling until about 5mm thick. The size of the rectangle then should be about 10cm wide by 30cm long.

Using a spatula or the back of spoon liberally spread a layer of crème pâtissière all over the dough. Then sprinkle as many chocolate chips on top as suits your taste. Using a sharp knife cut the dough into three long strips. Each strip should be just over 3cm wide and 30cm long.
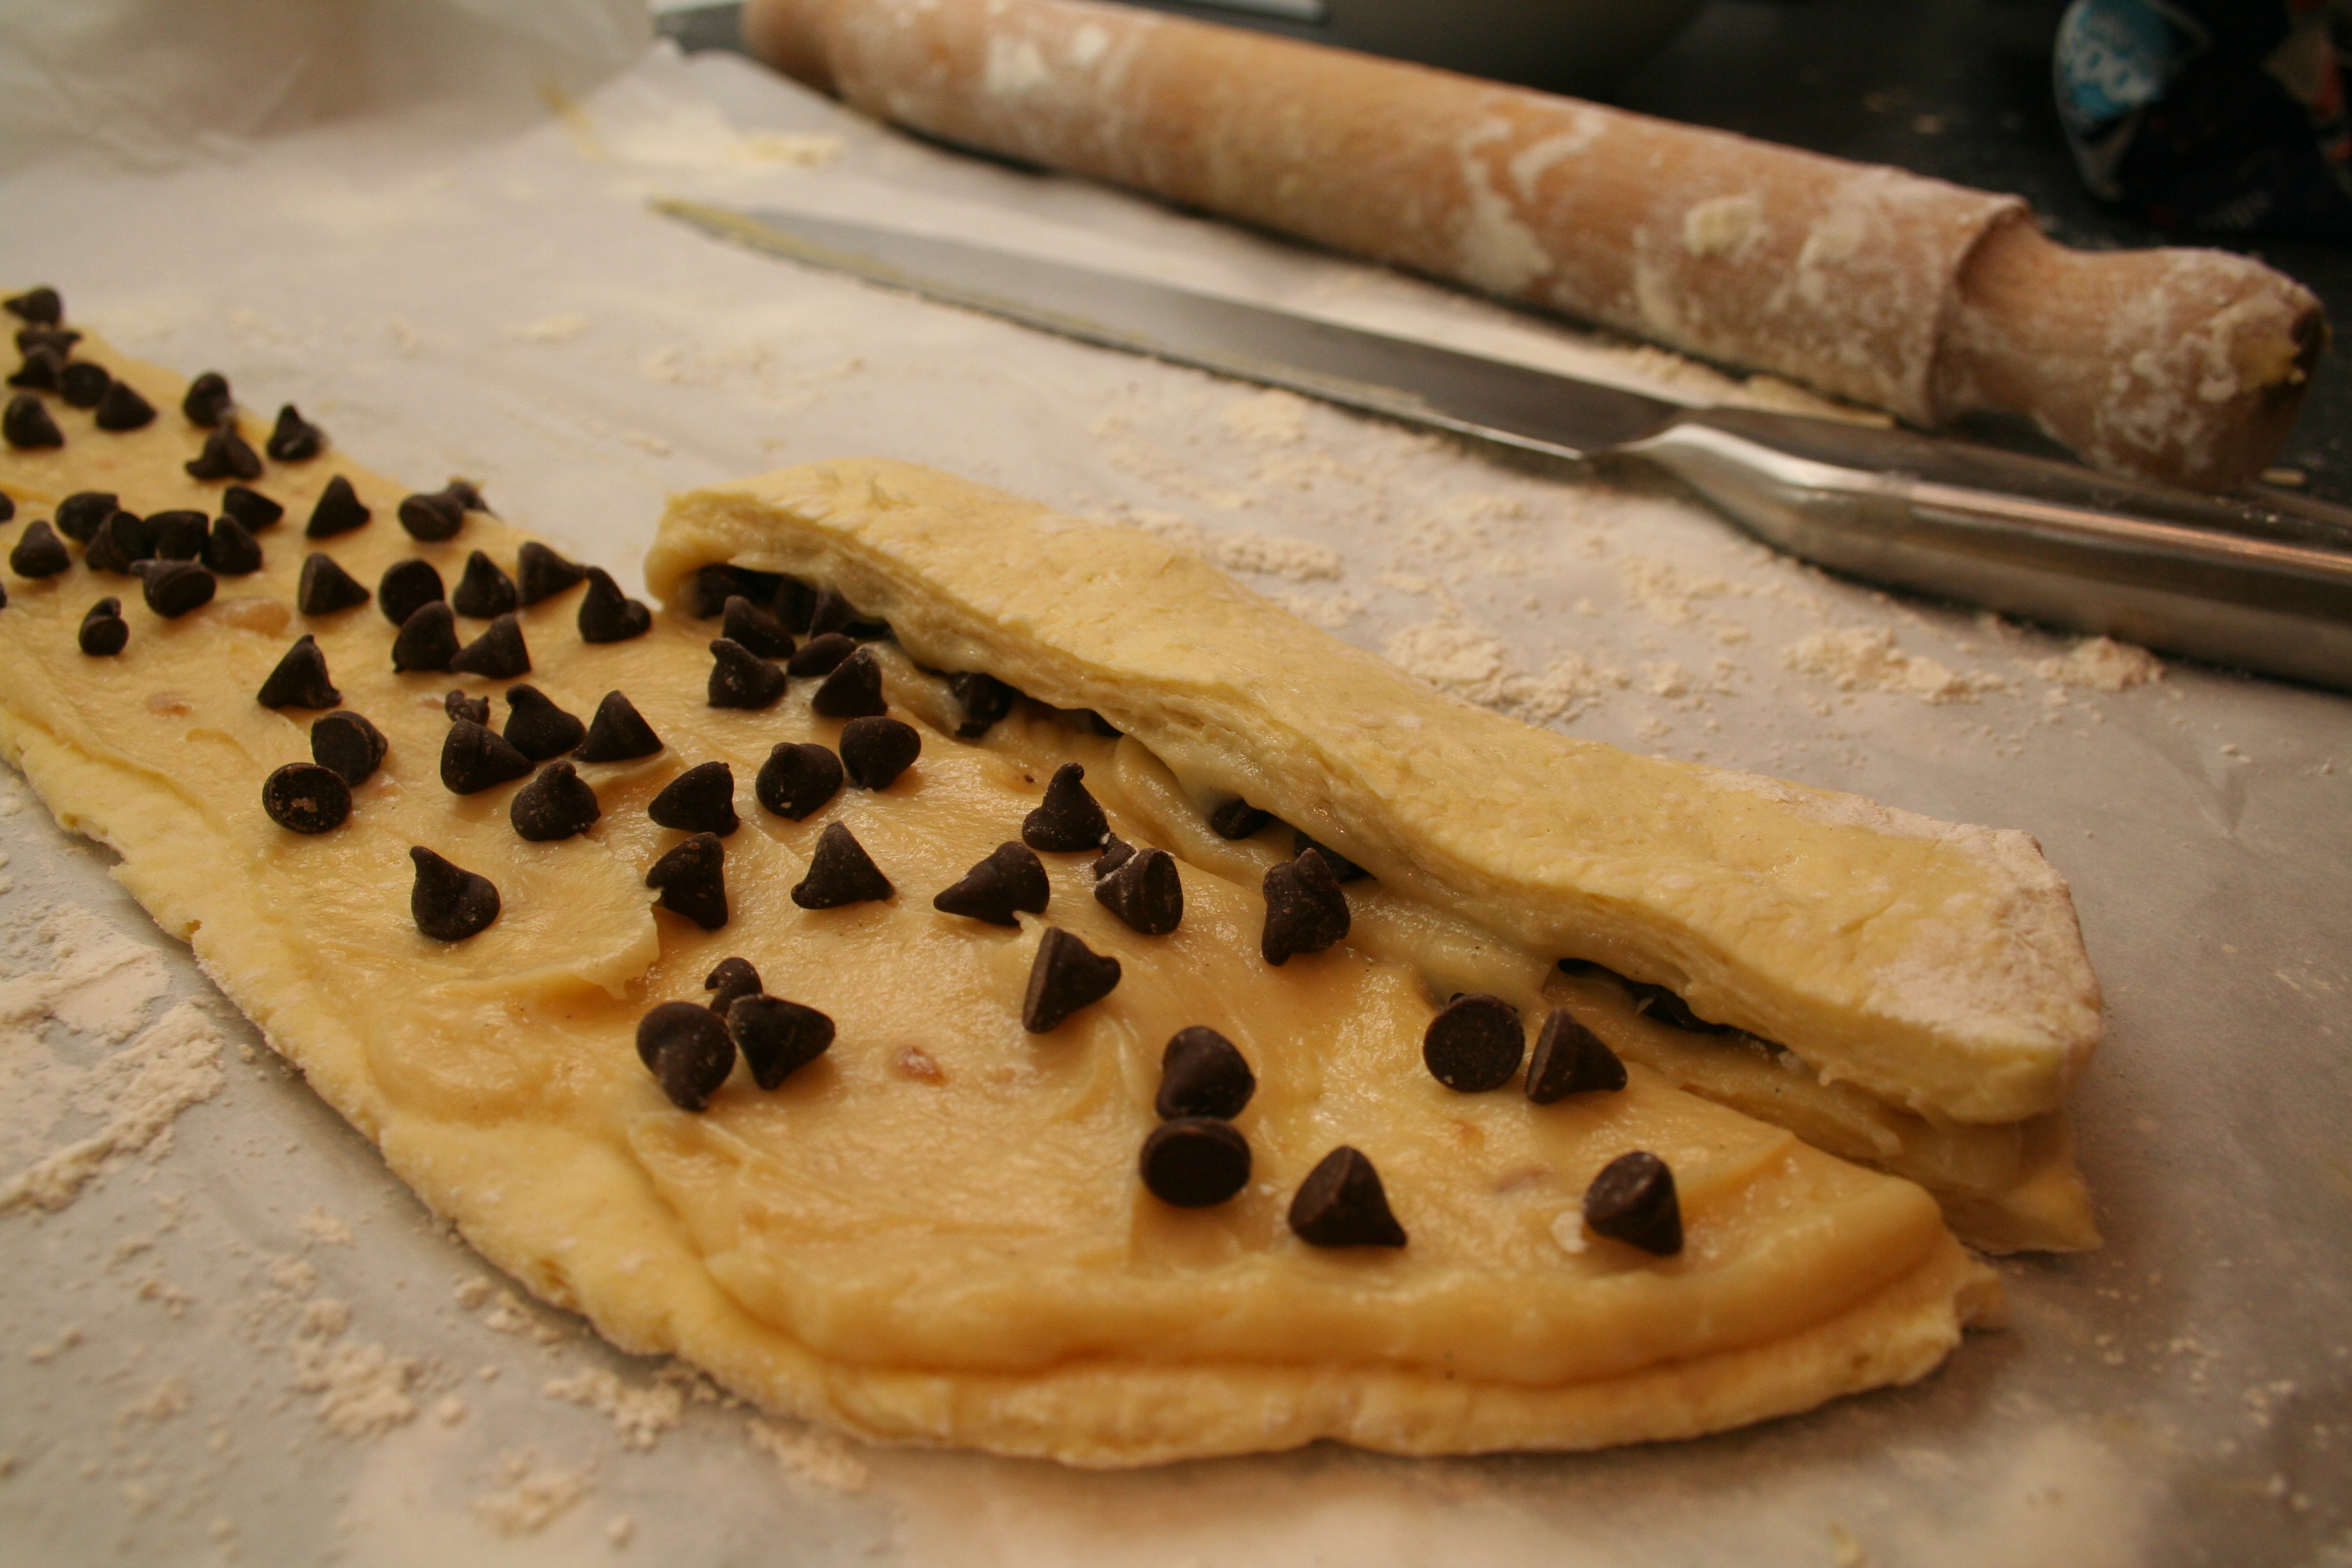
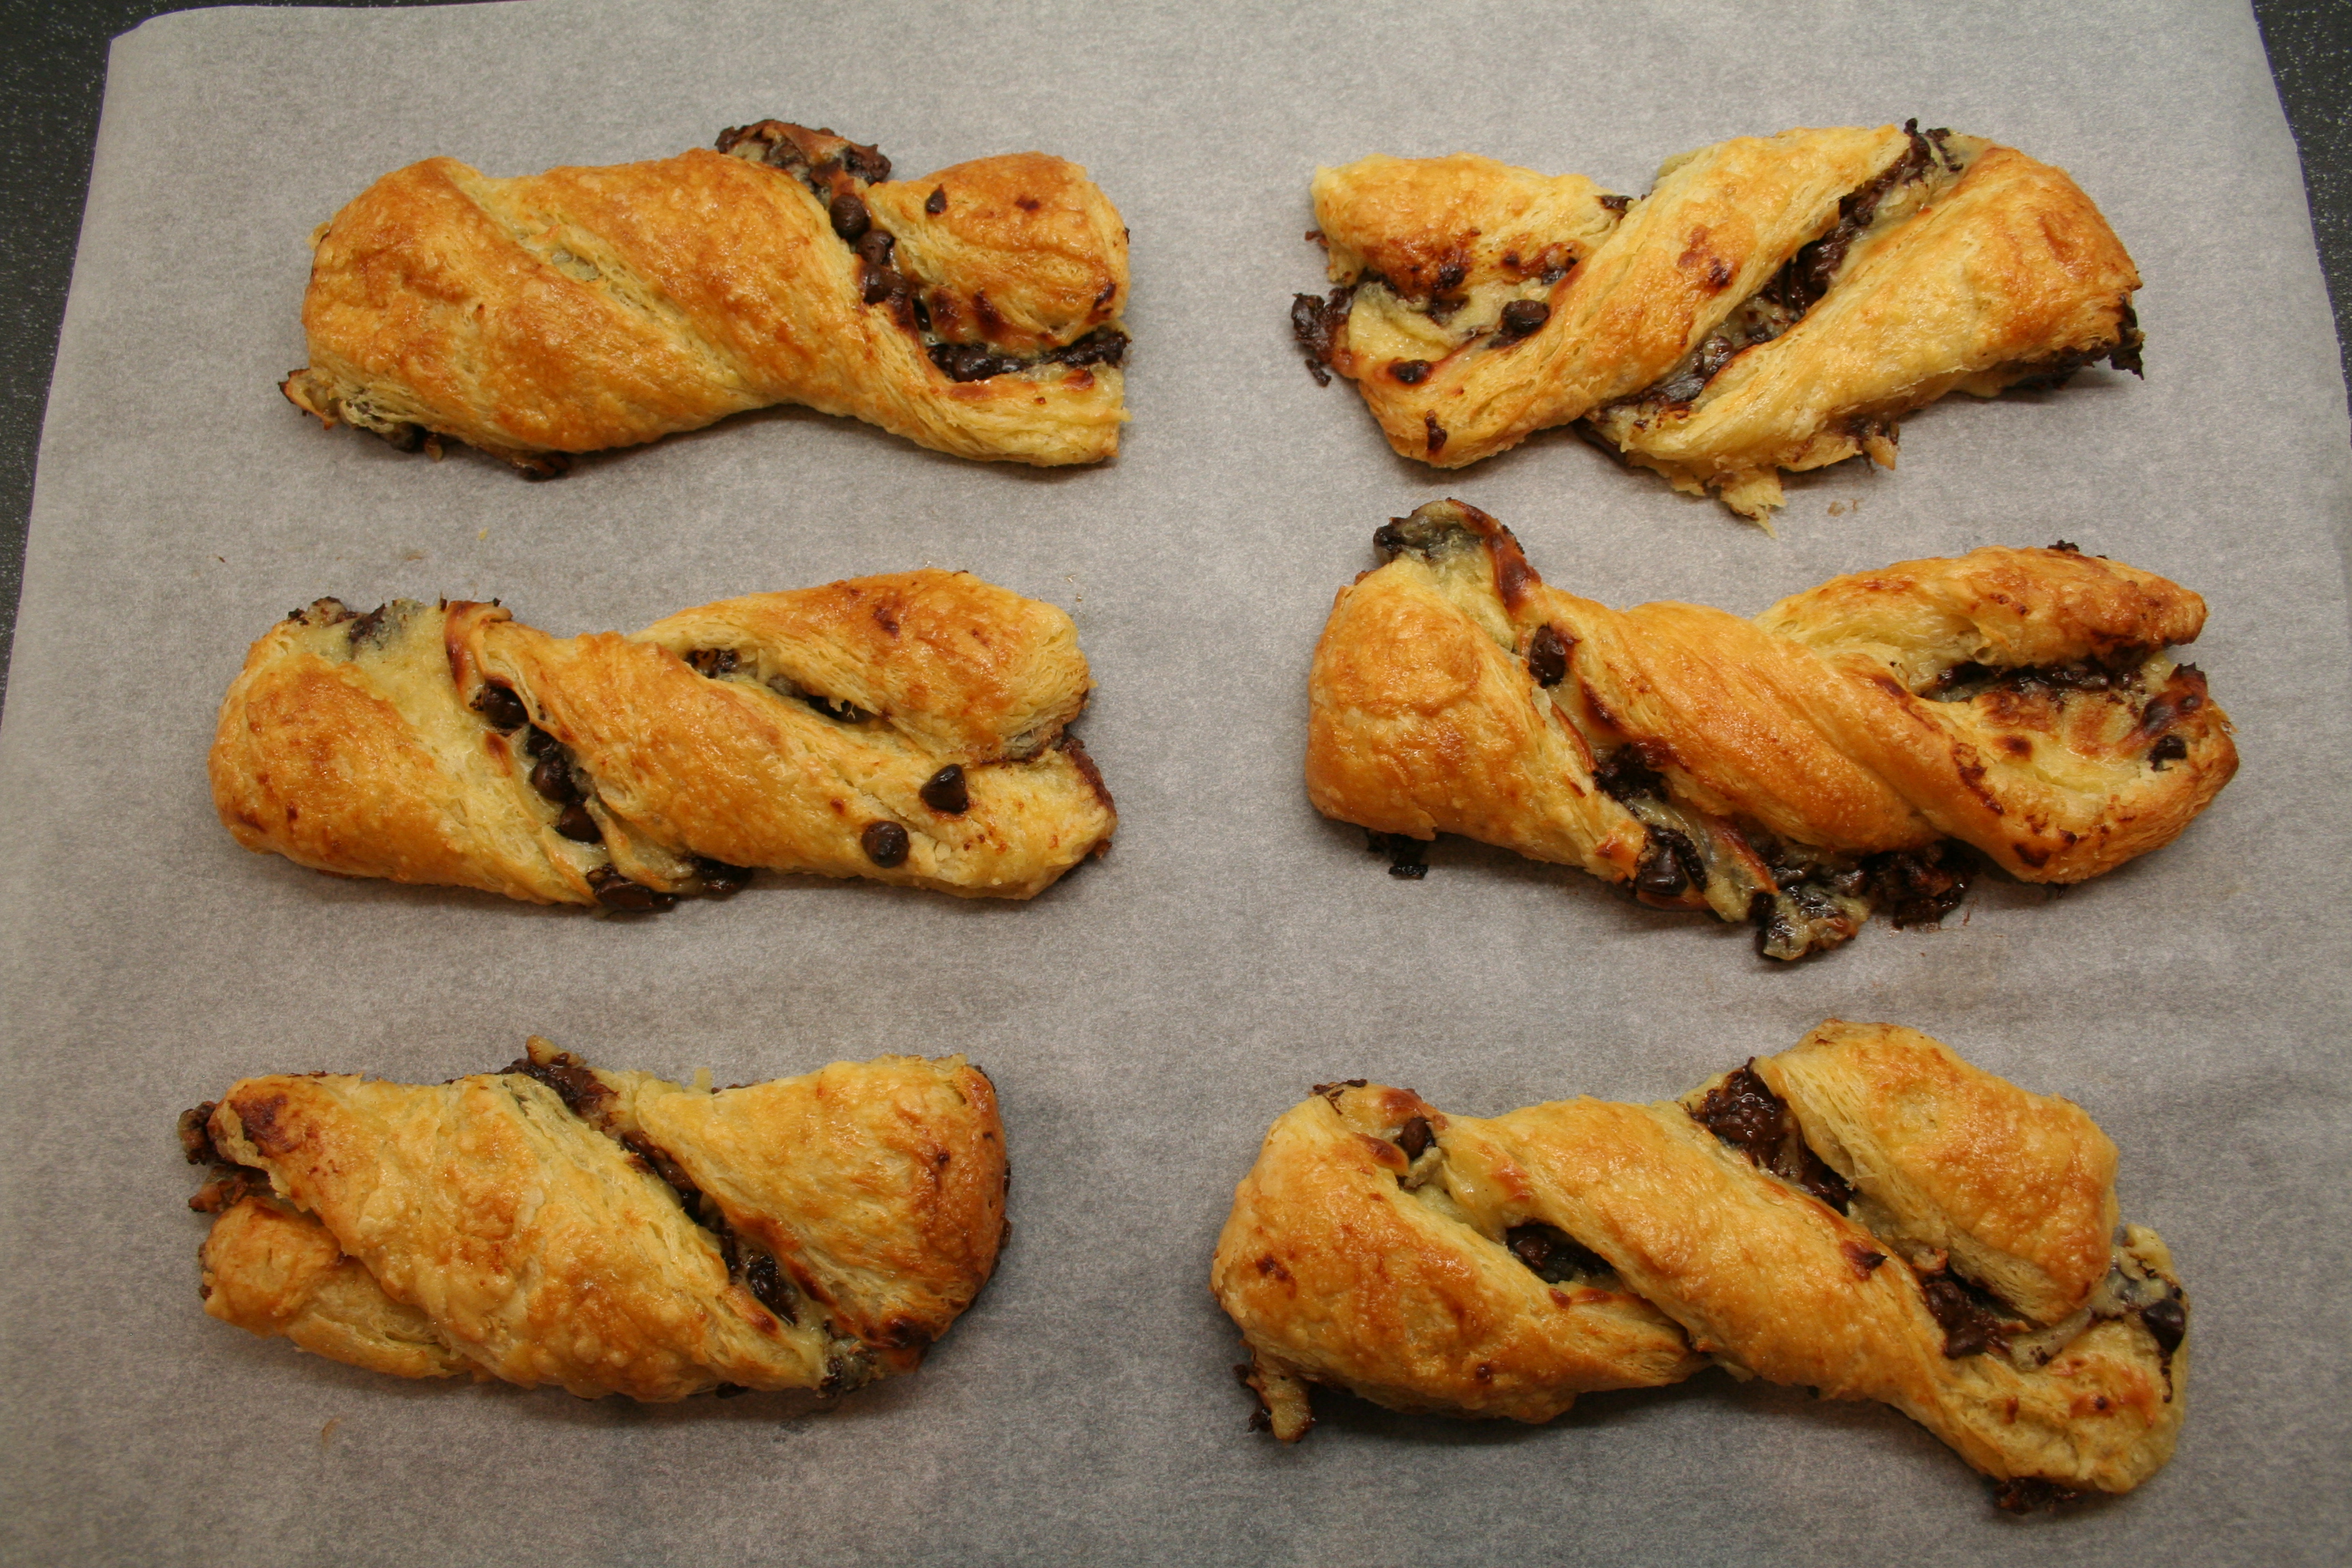
Now comes the tricky bit. Fold each strip in half lengthways so that the crème pâtissière and chocolate chips are sandwiched between two layers of dough. Using both hands gently (so as not to squish the filling out the sides) twist each strip over twice and place on a lightly greased baking tray.
Repeat this process with the two remaining pieces of refrigerated dough.

final rise
Before baking, the dough needs one final rise. Cover chocolate twists loosely with cling film place in a spot where the temperature is about 21°C-22°C for about an hour. The dough should almost double in size and feel light and springy when touched. If it does not rise, once baked the pastry will be hard and heavy instead of puffy and light. In hot weather it may be necessary to refrigerate the dough from time to time to prevent the butter from softening and oozing out.
baking
Just before baking, whisk the egg and brush the twists with the egg wash. Bake in the middle shelf at 240°C (220°C in fan oven) for 12 to 15 minutes until twists are nicely puffed and golden.
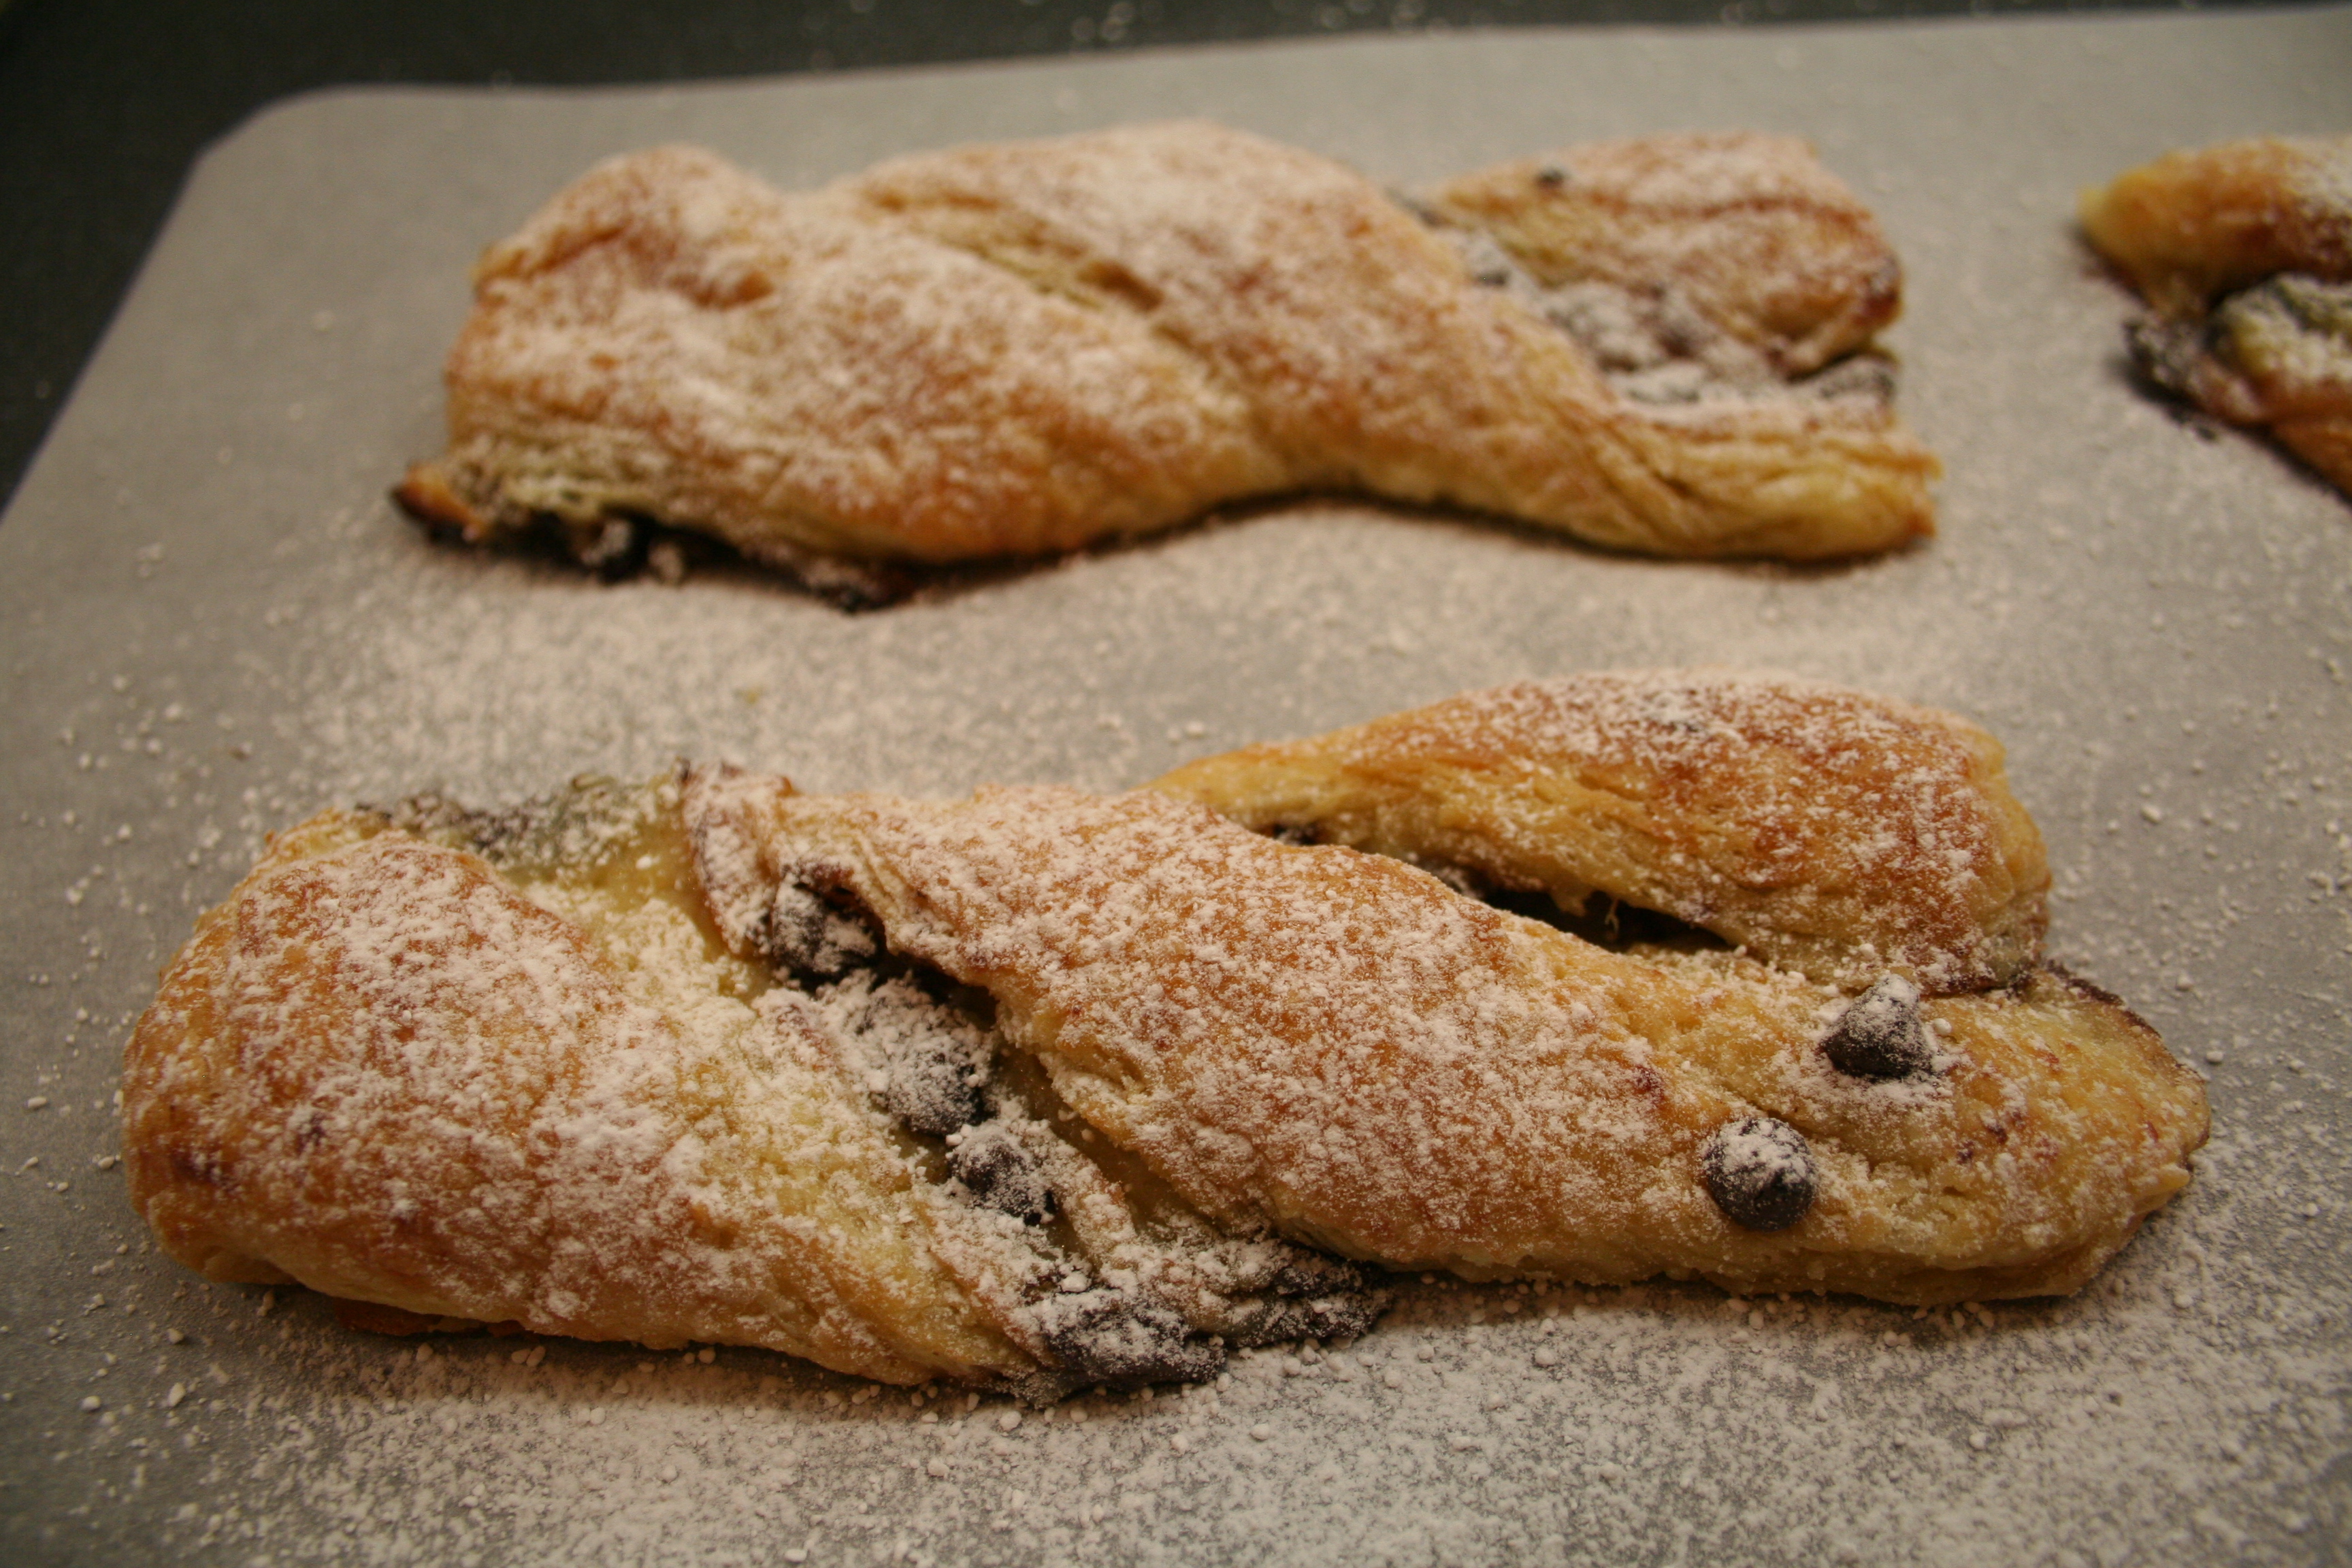
Cool on a wire rack for at least 10 to 15 minutes before dusting with icing sugar and serving (if you can wait that long). Chocolate twists are best eaten fresh.

August 4th, 2011 at 16:15
Please say you deliver 🙂
March 1st, 2026 at 17:05
It’s a n item that is so unbelievably impossible to order, online ( only through express – if in stock when you do!? ) But. To Asda, Morrisons, Can we have these available for home delivery please!? Without being constantly disappointed as an unavailable item!!
I’m just short of opening up a small pastries delivery service! Plus daily. Like a milk man! This is in motion. Coming to a street near you soon! 😉
August 5th, 2011 at 00:02
Looks amazing but hard work.
I’m going to continue loitering in the pastry aisle at Sainsbury’s of an evening until they discount them to about 10p.
August 5th, 2011 at 08:55
Adam I certainly do – for a fee of course 😉
Dave – it’s not as hard as it looks – waiting for Sainsbury’s to discount them might be more frustratng!
August 5th, 2011 at 12:19
At least I know what to buy you for a happy occasion! Your salt and bread will be delivered on huge marble slab.
Mine was a wedding gift and I love it! – though it moves when I roll fondant! Annoying!!
Guess we will have to just order a huge marble kitchen.
XXX
They look yummy – come train the kiddies to make them.
August 21st, 2011 at 08:07
Looks fantastic G. Once again I’m intrigued to read more…
August 21st, 2011 at 15:38
Wow, I certainly love laminated dough and with chocolate? Makes it even better! Loving your recipes, thanks for sharing!
September 25th, 2011 at 21:03
[…] the dough is rising make the pastry cream. This is essentially a crème pâtissière, however this recipe is slightly less hassle to make – and deliciously ideal for this […]
May 13th, 2012 at 18:01
Fabulous recipe – surprisingly fast and turns out really well. Any chance you can add print option to your pages?
May 15th, 2012 at 06:56
Am thrilled someone has tried it! Glad it worked out well. Will look into adding a print option-thanks for the feedback.
August 5th, 2013 at 17:46
I am making this right now. Just made the pastry cream and it is cooling. I am worried that it is to lumpy do you have any advice. This is the first time I have tried to make pastry cream. It tastes OK I am just worried about the lumps .
August 7th, 2013 at 07:52
Apologies for not getting back to you sooner. Once made, the pastry cream shouldn’t be lumpy at all – if it is, it’s possible that it wasn’t cooked and whisked long enough after it came to the boil and went lumpy in the first place? Reading your blog, I presume you remade it? Did it work better the second time?
With regards to egg quantities, the number of egg yolks in the recipe is correct (3 medium or 2 large) – the reason there are more in the picture is because I made a double quantity. Apologies that this is ambiguous.
I hope you enjoyed making and eating the chocolate twists!
August 7th, 2013 at 18:41
Yes I remade the pastry cream it was much better the second time. I don’t think I whisked it well enough the first time. We loved them!! thanks for the great recipe my husband is already asking me to make more.
August 5th, 2013 at 17:47
Also in your picture it looks like there might be 4-5 egg yolks the recipe only called for 3-2 maybe that is why mine looks funny.
August 6th, 2013 at 18:14
[…] https://thewishfulhousewife.com/2011/08/04/chocolate-twists/ […]
August 7th, 2013 at 07:52
Thanks for sharing your blog!
April 23rd, 2014 at 23:46
I baked it today, but I decided to use a different recipe for the pasta, because I thought i won’t be able to wait too long, and it was a bit hard to me 🙂 😀
But the creme patissiere was so perfect, and also the whole chocholate twist is sooooo delicious! I’ve became addict with this 🙂
Thanks a lot, it was really perfect, and so similar like the ones from Costa
April 24th, 2014 at 08:06
So pleased to hear this Maria – hope you enjoy many more. And do try the pastry when you have time – you won’t be disappointed!
April 24th, 2014 at 11:08
So mine looks like this:
September 10th, 2014 at 13:54
[…] lovely blogger who prepared the same some time ago. The Wishful Housewife (check out her blog on : https://thewishfulhousewife.com/2011/08/04/chocolate-twists/) is the person behind this recipe. Her detailed and easy step by step pictorial instructions will […]
July 21st, 2015 at 20:38
Stumbled upon you’re lovely recipe and decided to try it out, my dough is rising, but am I crazy? I can’t seem to figure out where the canola oil is used in this recipe. I’m afraid I may have left out an important step? Please let me know!
November 19th, 2017 at 01:28
I see you don’t monetize your page, don’t waste your traffic, you can earn additional bucks every
month because you’ve got hi quality content.
If you want to know how to make extra money, search for: Boorfe’s tips best adsense alternative
June 18th, 2020 at 11:03
hi! i’m going to use ready to roll puff pastry for my first try at it. how much will i need for the recipe?
June 24th, 2021 at 10:45
Hi if I wanted to make a big batch of these how could I store them? Can I store them uncooked and cook at a later date?